Miguel


Thin PDB clones on ext4 filesystem with Oracle 12.1.0.2

Oracle 12.1.0.2 brings a great new functionality: you can create thin clones – that is, not copying the source files, just pointers – on ext4 filesystem, the current default on Red Hat Linux 6.

Requirements for example below:
– Oracle 12.1.0.2
– Data files are on ext4 filesystem (or other supporting sparse files)
– Source PDB on read only mode

It is very simple to set up:

SQL> alter system set clonedb=TRUE scope=spfile;
SQL> shutdown immediate
SQL> startup

SQL> show parameter clonedb
NAME                                 TYPE        VALUE
------------------------------------ ----------- ------------------------------
clonedb                              boolean     TRUE

I will create a clone of the PDB2 database.

SQL> select name,con_id,open_mode,SNAPSHOT_PARENT_CON_ID from v$pdbs;

NAME                               CON_ID OPEN_MODE  SNAPSHOT_PARENT_CON_ID
------------------------------ ---------- ---------- ----------------------
PDB$SEED                                2 READ ONLY                       0
PDB1                                    3 MOUNTED                         0
PDB2                                    4 READ ONLY                       0

For this I need first to create the target directory for the datafiles.

SQL> ! mkdir -p /u01/app/oracle/oradata/NONRAC/PDB2_CLONE1

Then I can do the clone using the ‘snapshot copy’ clause. It took 9 seconds.

SQL> create pluggable database PDB2_C1 from PDB2 snapshot copy file_name_convert=('/u01/app/oracle/oradata/NONRAC/PDB2','/u01/app/oracle/oradata/NONRAC/PDB2_CLONE1');
Pluggable database created.

Elapsed: 00:00:09.35

Note that the new PDB remains in MOUNT state and without showing a connection to its parent. I find unfortunate the lack of that information.

SQL> select name,con_id,open_mode,SNAPSHOT_PARENT_CON_ID from v$pdbs;

NAME                               CON_ID OPEN_MODE  SNAPSHOT_PARENT_CON_ID
------------------------------ ---------- ---------- ----------------------
PDB$SEED                                2 READ ONLY                       0
PDB1                                    3 MOUNTED                         0
PDB2                                    4 READ ONLY                       0
PDB2_C1                                 5 MOUNTED                         0

After we open the clone in READ WRITE mode, then we can see the relationship with the parent.

SQL> alter pluggable database PDB2_C1 open read write;
Pluggable database altered.
Elapsed: 00:00:02.12

SQL> select name,con_id,open_mode,SNAPSHOT_PARENT_CON_ID from v$pdbs;

NAME                               CON_ID OPEN_MODE  SNAPSHOT_PARENT_CON_ID
------------------------------ ---------- ---------- ----------------------
PDB$SEED                                2 READ ONLY                       0
PDB1                                    3 MOUNTED                         0
PDB2                                    4 READ ONLY                       0
PDB2_C1                                 5 READ WRITE                      4

And below we verify that the clone uses 4MB instead of 800MB of the source database.

SQL> ! du -m /u01/app/oracle/oradata/NONRAC/PDB2/*
6       /u01/app/oracle/oradata/NONRAC/PDB2/PDB2_users01.dbf
586     /u01/app/oracle/oradata/NONRAC/PDB2/sysaux01.dbf
261     /u01/app/oracle/oradata/NONRAC/PDB2/system01.dbf
1       /u01/app/oracle/oradata/NONRAC/PDB2/temp01.dbf

SQL> ! du -m /u01/app/oracle/oradata/NONRAC/PDB2_CLONE1/*
1       /u01/app/oracle/oradata/NONRAC/PDB2_CLONE1/PDB2_users01.dbf
1       /u01/app/oracle/oradata/NONRAC/PDB2_CLONE1/sysaux01.dbf
1       /u01/app/oracle/oradata/NONRAC/PDB2_CLONE1/system01.dbf
1       /u01/app/oracle/oradata/NONRAC/PDB2_CLONE1/temp01.dbf

We can also clone non-CDB databases with some more steps, as explained at:
https://dbamarco.wordpress.com/2015/03/09/small-change-big-difference/

The clonedb.pl script (see documentation here) can also be used, even though you might find easier to script yourself to your own environment.

How to drop corrupted PDB? 1

Today on my test system I did delete by mistake all the datafiles from one PDB on Oracle 12.1.0.2.

Then, when I wanted to drop it from the CDB, I was getting the error:

SQL> drop pluggable database PDB2_C2 including datafiles;
drop pluggable database PDB2_C2 including datafiles
*
ERROR at line 1:
ORA-01116: error in opening database file 19
ORA-01110: data file 19: '/shared/oradata/NONRAC/PDB2_CLONE2/system01.dbf'
ORA-27041: unable to open file
Linux-x86_64 Error: 2: No such file or directory
Additional information: 3

After I tried to see if RMAN would propose any solution, knowing that there were no backups or archivelogs.

RMAN> advise failure;

Database Role: PRIMARY

List of Database Failures
=========================

Failure ID Priority Status    Time Detected Summary
---------- -------- --------- ------------- -------
62         CRITICAL OPEN      16-NOV-15     System datafile 19: '/shared/oradata/NONRAC/PDB2_CLONE2/system01.dbf' is corrupt
22         CRITICAL OPEN      16-NOV-15     System datafile 19: '/shared/oradata/NONRAC/PDB2_CLONE2/system01.dbf' is missing

analyzing automatic repair options; this may take some time
allocated channel: ORA_DISK_1
channel ORA_DISK_1: SID=31 device type=DISK
analyzing automatic repair options complete

Mandatory Manual Actions
========================
1. If file /shared/oradata/NONRAC/PDB2_CLONE2/system01.dbf was unintentionally renamed or moved, restore it
2. Contact Oracle Support Services if the preceding recommendations cannot be used, or if they do not fix the failures selected for repair
3. Please contact Oracle Support Services to resolve failure 62: System datafile 19: '/shared/oradata/NONRAC/PDB2_CLONE2/system01.dbf' is corrupt

Optional Manual Actions
=======================
no manual actions available

Automated Repair Options
========================
no automatic repair options available

With the help of my Trivadis colleague Daniele Massimi quickly we found the solution.
The CDB was now in mount mode.

$ sqlplus / as sysdba

SQL*Plus: Release 12.1.0.2.0 Production on Mon Nov 16 17:28:43 2015
Copyright (c) 1982, 2014, Oracle.  All rights reserved.
Connected to an idle instance.

SQL> startup
ORACLE instance started.

Total System Global Area 1509949440 bytes
Fixed Size                  2924640 bytes
Variable Size             973082528 bytes
Database Buffers          520093696 bytes
Redo Buffers               13848576 bytes
Database mounted.
ORA-01157: cannot identify/lock data file 19 - see DBWR trace file
ORA-01110: data file 19: '/shared/oradata/NONRAC/PDB2_CLONE2/system01.dbf'

SQL> alter database datafile 19 offline drop;
alter database datafile 19 offline drop
*
ERROR at line 1:
ORA-01516: nonexistent log file, data file, or temporary file "19"

SQL> alter session set container=PDB2_C2;
Session altered.

SQL> alter database datafile 19 offline drop;
Database altered.

SQL> alter session set container=cdb$root;
Session altered.

SQL> alter database open;
Database altered.

SQL> drop pluggable database PDB2_C2 including datafiles;
Pluggable database dropped.

Moral of the story: be careful when deleting files. 🙂


Install latest version of Oracle Goldengate 12

With Oracle Goldengate 12 there is now a big change on the way to install: there is an installer!

Up to Oracle Goldengate 11 every new patch was a new complete version. With Oracle Goldengate 12 you need to install a base version and then the latest patch.

Here is a quick sum up of the instructions (done on AIX, but is similar on Linux):

  1. From Oracle website download the Goldengate 12.1.2.1.0 for your operating system
  2. From Oracle support note 1645495.1 download the latest patchset for Goldengate. Check the availability for your OS.
  3. Unzip both downloaded files
  4. Call the <download_dir>/ggs_AIX_ppc_shiphome/Disk1/runInstaller
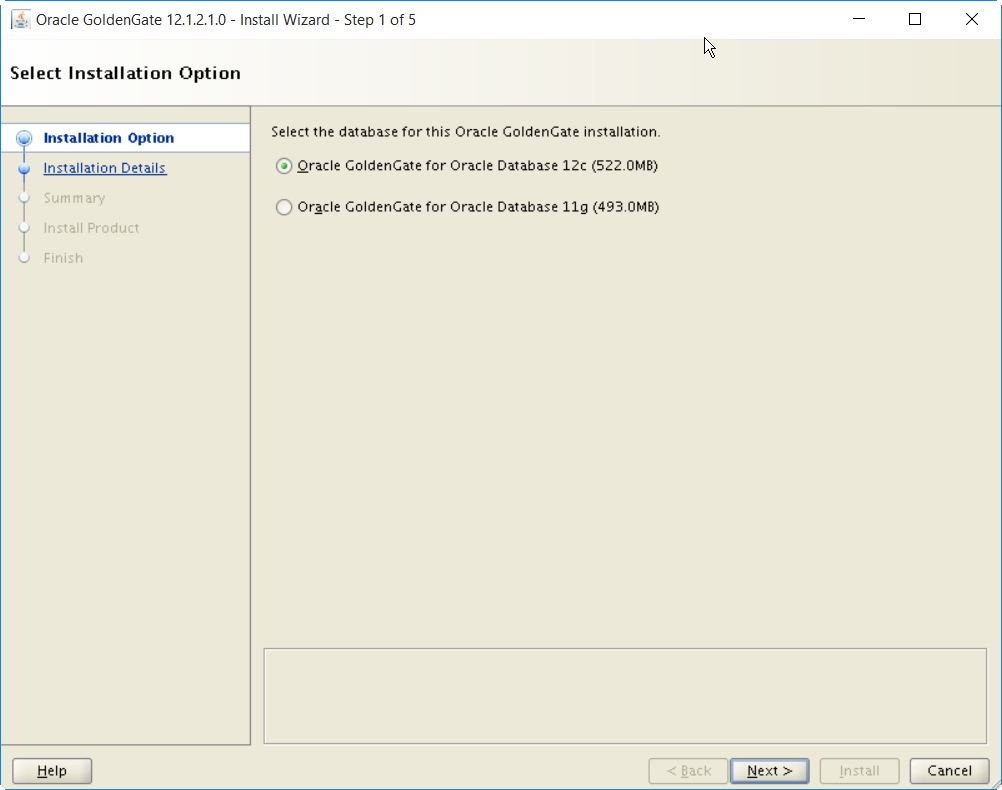
  5. Follow the instructions by choosing the target DB version and install directory (I recommend $ORACLE_BASE/product/gg)
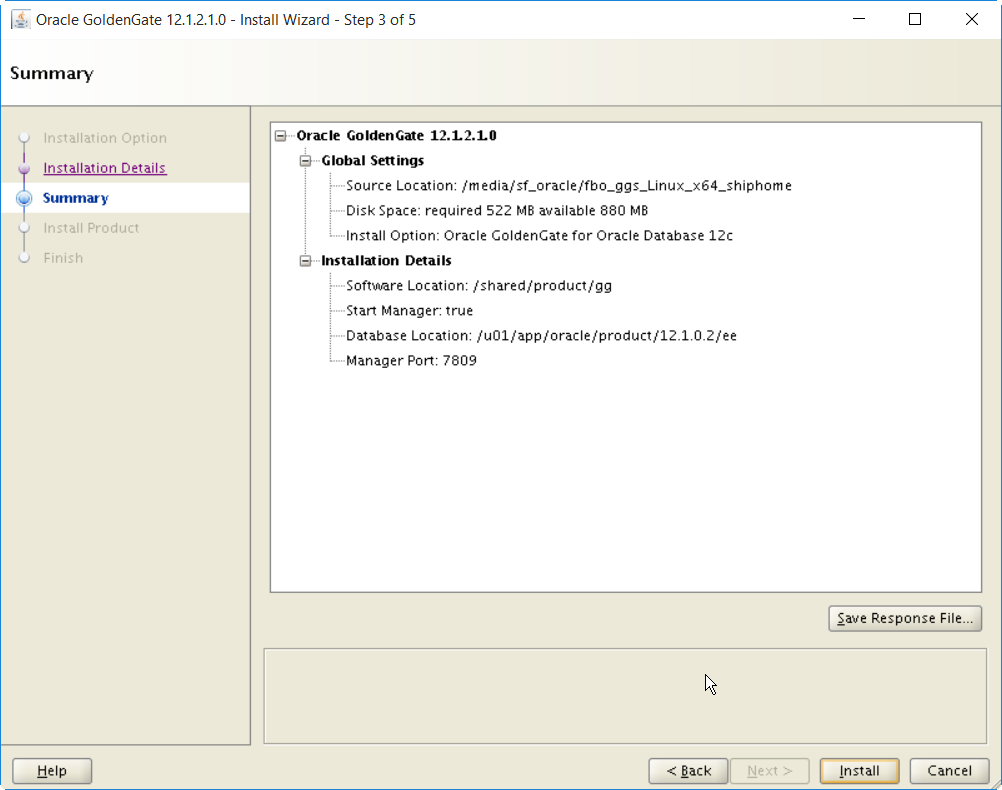
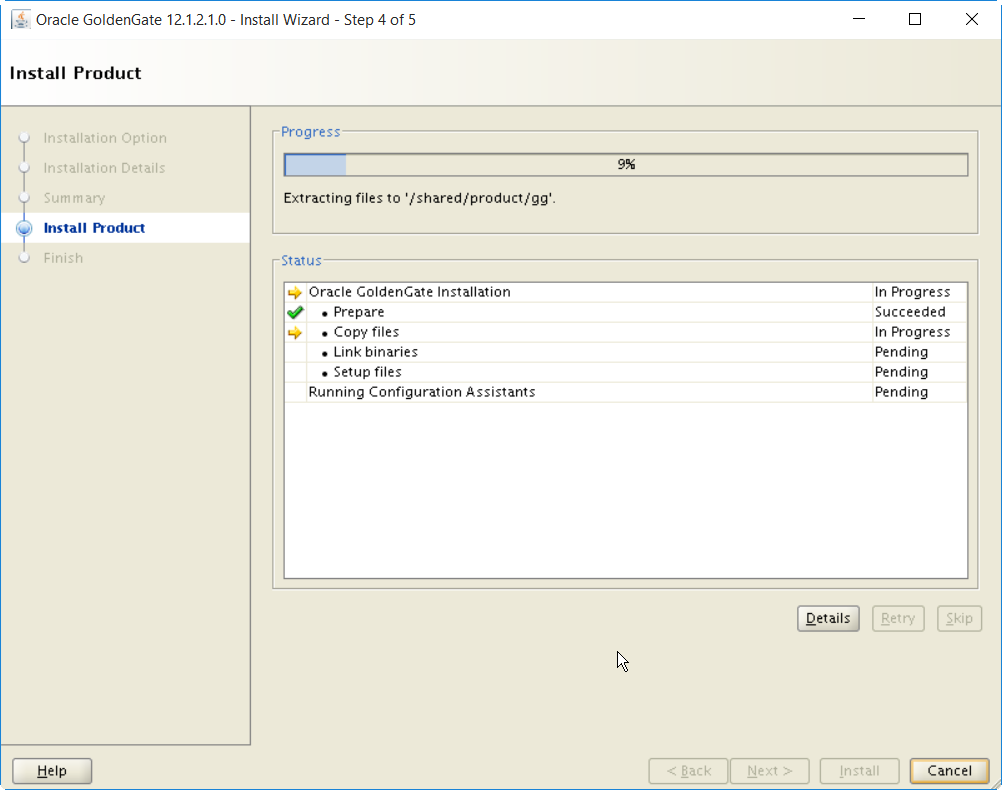
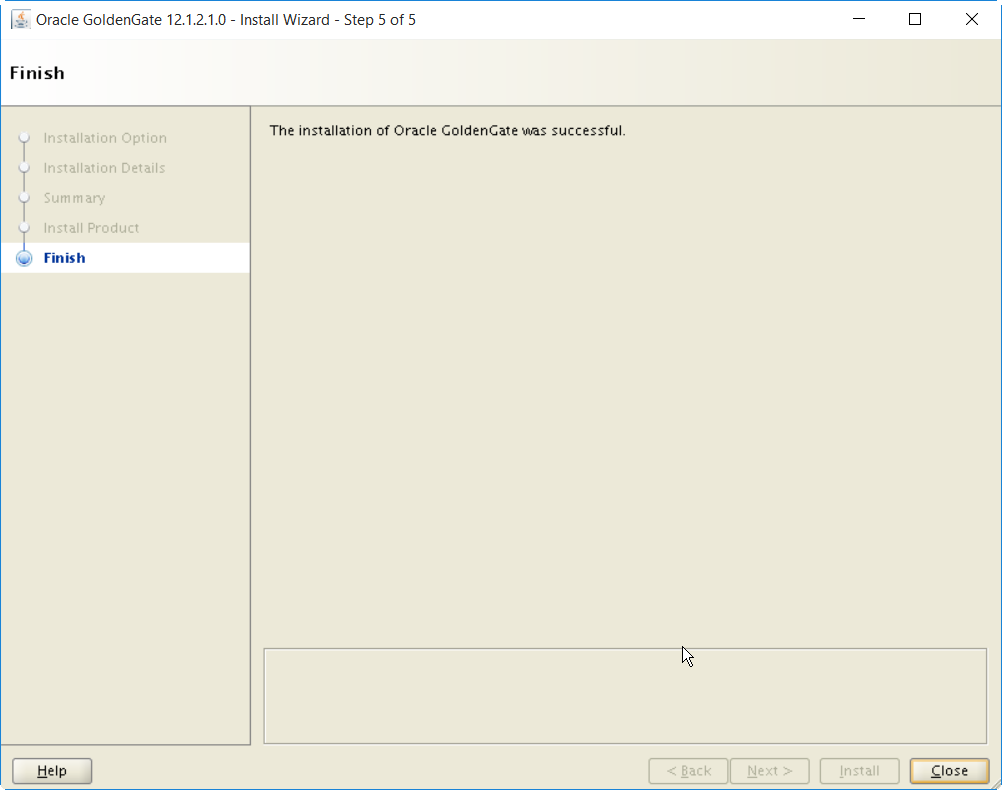
  6. Oracle GoldenGate 12.1.2.1.0 - Install Wizard - Step 1 of 5

    Oracle GoldenGate 12.1.2.1.0 - Install Wizard - Step 2 of 5

    Oracle GoldenGate 12.1.2.1.0 - Install Wizard - Step 3 of 5

    Oracle GoldenGate 12.1.2.1.0 - Install Wizard - Step 4 of 5

    Oracle GoldenGate 12.1.2.1.0 - Install Wizard - Step 5 of 5

  7. Check it works
  8. # set ORACLE_HOME to an existing Oracle database installation:
    export ORACLE_HOME=$ORACLE_BASE/product/11.2.0.4
    
    # set LD_LIBRARY_PATH to use libraries from $ORACLE_HOME:
    export LD_LIBRARY_PATH=$ORACLE_HOME/lib:$ORACLE_BASE/product/gg
    
    # Start Goldengate:
    cd $ORACLE_BASE/product/gg
    ./ggsci
    
    Oracle GoldenGate Command Interpreter for Oracle
    Version 12.1.2.1.1 19797716 OGGCORE_12.1.2.1.1_PLATFORMS_141026.2215
    AIX 6, ppc, 64bit (optimized), Oracle 11g on Oct 27 2014 00:19:39
    Operating system character set identified as ISO-8859-1.
    
    Copyright (C) 1995, 2014, Oracle and/or its affiliates. All rights reserved.
    
    GGSCI (anjovm1) 1> info all
    
    Program Status Group Lag at Chkpt Time Since Chkpt
    
    MANAGER STOPPED
    GGSCI (anjovm1) 2> exit
    
  9. Install the latest patchset with OPatch
  10. cd <download_dir>/21785294
    $ORACLE_BASE/product/gg/OPatch/opatch apply -oh $ORACLE_BASE/product/gg
    
    Invoking OPatch 11.2.0.1.7
    
    Oracle Interim Patch Installer version 11.2.0.1.7
    Copyright (c) 2011, Oracle Corporation.  All rights reserved.
    
    Oracle Home       : /oracle/app/product/gg121
    Central Inventory : /oracle/oraInventory
       from           : /etc/oraInst.loc
    OPatch version    : 11.2.0.1.7
    OUI version       : 11.2.0.3.0
    Log file location : /oracle/app/product/gg121/cfgtoollogs/opatch/opatch2015-11-11_08-32-55AM.log
    
    Applying interim patch '21785294' to OH '/oracle/app/product/gg121'
    Verifying environment and performing prerequisite checks...
    
    Do you want to proceed? [y|n] y
    User Responded with: Y
    All checks passed.
    
    Please shutdown Oracle instances running out of this ORACLE_HOME on the local system.
    (Oracle Home = '/oracle/app/product/gg121')
    
    Is the local system ready for patching? [y|n] y
    User Responded with: Y
    Backing up files...
    
    Patching component oracle.oggcore.ora11g, 12.1.2.1.0...
    Patch 21785294 successfully applied
    Log file location: /oracle/app/product/gg121/cfgtoollogs/opatch/opatch2015-11-11_08-32-55AM.log
    
    OPatch succeeded.
    
  11. Check it is updated
# Start Goldengate:
cd $ORACLE_BASE/product/gg
./ggsci

Oracle GoldenGate Command Interpreter for Oracle
Version 12.1.2.1.10 21604177 OGGCORE_12.1.2.1.0OGGBP_PLATFORMS_150902.1337
AIX 6, ppc, 64bit (optimized), Oracle 11g on Sep  2 2015 16:29:21
Operating system character set identified as ISO-8859-1.

Copyright (C) 1995, 2015, Oracle and/or its affiliates. All rights reserved.

GGSCI (anjovm1) 1> 

We have now Oracle Goldengate 12.1.2.1.10 installed.

Interesting enough is that Oracle Goldengate 12.1 still uses the OPatch version 11.2.0.1.7, taken probably from Oracle 11.2.0.3, as we can see from the line “OUI version : 11.2.0.3.0”.


Oracle October 2015 CPU – quick and dirty install on 11.2.0.4 and 12.1.0.2 4

[Update 17.11.2015 – Thanks Lars Johan Ulveseth for the extra testing and comment – see below. In fact I’ve only tested the PSU installation on a non-CDB 12c database. There is a missing step, added now, when you are in a multitenant configuration with pluggable databases. Script updated based on Lars comments.]

Following my January post, here are basic instructions to install the latest Oracle security patch. While one should always read the documentation, below you can find how to install CPU Oct 2015  on single instance. Please count about 5 minutes downtime on your database (a bit more if it is the first time you are doing this).

If you are single instance database (no RAC) and either 11.2.0.4 or 12.1.0.2 here are the quick summary of the installation. Tested on Linux and AIX:

Oracle 12.1.0.2 – October 2015 CPU installation

OPatch: You need to update the OPatch tool, minimum version is 12.1.0.1.7. Direct download from Oracle support.

Bundle 12.1.0.2 – Patch 21520444 – Combo OJVM PSU 12.1.0.2.5 and Database PSU 12.1.0.2.5 for UNIX

  • Patch 21359755 – Database Patch Set Update 12.1.0.2.5 (Oct2015) –> RAC-Rolling Installable
  • Patch 21555660 – Oracle JavaVM Component 12.1.0.2.5 Database PSU (OCT2015) –> Non RAC-Rolling Installable
export PATCH_LOC="/tmp"

1. Download + Upgrade OPatch (Opatch download direct link)

unzip ${PATCH_LOC}/p6880880_121010_Linux-x86-64.zip -d $ORACLE_HOME

2. Stop database+listeners+agent

3. Apply DB PSU (21359755 ) but do NOT run DB PSU post install steps

cd ${PATCH_LOC}
unzip p2*
cd 2*
cd 21359755/
$ORACLE_HOME/OPatch/opatch apply

3. Apply OJVM PSU patch

cd ../21555660/
$ORACLE_HOME/OPatch/opatch apply

4. Restart database [and open pluggable databases] in upgrade mode

SQL> startup upgrade;
SQL> alter pluggable database all open upgrade;

5. Run post install steps

cd $ORACLE_HOME/OPatch
./datapatch -verbose

6. Restart database [and open pluggable databases] in normal mode

SQL> shutdown;
SQL> startup;
SQL> alter pluggable database all open;


Oracle 11.2.0.4 – October 2015 CPU installation

Bundle 11.2.0.4 – Patch 21744335 – Combo OJVM PSU 11.2.0.4.5 and Database SPU 11.2.0.4 (CPUOct2015)

  • Patch 21352646 – Database Security Patch Update 11.2.0.4.0 (CPUOCT2015) –> RAC-Rolling Installable
  • Patch 21555791 – Oracle JavaVM Component 11.2.0.4.5 Database PSU (OCT2015) –> Non RAC-Rolling Installable
export PATCH_LOC="/tmp"
cd ${PATCH_LOC}
unzip p2*.zip
cd 2*

1. Shutdown databases and services
2. Apply DB PSU (21352646) but do NOT run DB PSU post install steps

cd 21352646
$ORACLE_HOME/OPatch/opatch napply -skip_subset -skip_duplicate

3. Apply OJVM PSU patch

cd ../21555791/
$ORACLE_HOME/OPatch/opatch apply

4. Run the OJVM PSU post install steps followed by the DB PSU (or equivalent) post install steps.

cd $ORACLE_HOME/sqlpatch/21555791
sqlplus / as sysdba 
SQL> startup upgrade
SQL> @postinstall.sql
SQL> shutdown immediate
SQL> exit;
cd $ORACLE_HOME/rdbms/admin
$ sqlplus / as sysdba
SQL> startup
SQL> @catbundle.sql cpu apply
SQL> @utlrp.sql
SQL> exit;


Oracle wallet on Windows registry – share with other users

I installed Oracle wallet to access passwordless to the remote databases, so I could do backups without specifying the password on any script.

The sqlnet.ora has the following information concerning the wallet:

WALLET_LOCATION =
(SOURCE =
(METHOD = reg)
(METHOD_DATA = (KEY = DEFAULT)))

SQLNET.WALLET_OVERRIDE = TRUE
SSL_CLIENT_AUTHENTICATION = FALSE

The other day, I got the need of giving access to remote databases to another windows user, so he could run a refresh schema/database script.

He was getting the following error when trying to access any database:

ORA-12578: TNS:wallet open failed

While I could just have set a different TNS_ADMIN variable pointing to a sqlnet.ora with

SQLNET.WALLET_OVERRIDE = FALSE

this was not the solution for him to use an automatic script.

The solution was to export/import the following branch of the registry from my windows user to the other windows user:

\\HKEY_CURRENT_USER\SOFTWARE\ORACLE\WALLETS

Note that these entries contain the encrypted password to the wallet, allowing the user to add/remove/modify/see the contents, including passwords, of the current wallet.


Solution for slow login after installing Oracle Linux

After installing Oracle Linux on Virtualbox, I noticed that login in was quite slow. Between the time we enter the login and the moment it asks the password it takes a few seconds.

The solution was to disable the usage of reverse IP resolution on the ssh server.

It can be done by adding/changing the following line on /etc/ssh/sshd_config

UseDNS no

And restart the ssh deamon:

# service sshd restart
Stopping sshd:                                [ OK ]
Starting sshd:                                [ OK ]

Datapump elapsed time on 11.2.0.4

Data-Pump-for-OracleToday I notice a small difference when you export/import using Datapump and you connect to a 11.2.0.4 database: there is the elapsed time at the end.

Both times I was using the binary from Oracle 11.2.0.4:

Export: Release 11.2.0.4.0 - Production on Sun Mar 22 21:07:25 2015

But the output is slight different at the end of the job:

Connected to: Oracle Database 11g Release 11.2.0.4.0 - 64bit Production
...
Job "RMAN"."SYS_EXPORT_SCHEMA_01" successfully completed at Sun Mar 22 21:10:07 2015 elapsed 0 00:02:21

Or:

Connected to: Oracle Database 11g Release 11.2.0.3.0 - Production
...
Job "RMAN"."SYS_EXPORT_SCHEMA_03" successfully completed at 21:07:43


Oracle January 2015 CPU – quick and dirty install on 11.2.0.4 and 12.1.0.2 1

While one should always read the documentation accompanying the patches, the new January 2015 (and in some extend also October 2014) are more complex to install with a java and a db components.

If you are single instance database (no RAC) and either 11.2.0.4 or 12.1.0.2 here are the quick summary of the installation. Tested on Linux and Solaris SPARC:

Oracle 12.1.0.2 – January 2015 CPU installation

Bundle 12.1.0.2 – Patch 20132434

  • Patch 19769480 – Database Patch Set Update 12.1.0.2.2 (Jan2015) –> RAC-Rolling Installable
  • Patch 19877336 – Oracle JavaVM Component 12.1.0.2.2 Database PSU (JAN2015) –> Non RAC-Rolling Installable
export PATCH_LOC="/tmp"

1. Download + Upgrade OPatch

unzip ${PATCH_LOC}/p6880880_121010_Linux-x86-64.zip -d $ORACLE_HOME

2. Stop database+listeners+agent

3. Apply DB PSU (19769480) but do NOT run DB PSU post install steps

cd ${PATCH_LOC}
unzip p2*
cd 2*
cd 19769480/
$ORACLE_HOME/OPatch/opatch apply

3. Apply OJVM PSU patch

cd ../19877336/
$ORACLE_HOME/OPatch/opatch apply

4. Restart database

5. Run post install steps

cd $ORACLE_HOME/OPatch
./datapatch -verbose


Oracle 11.2.0.4 – January 2015 CPU installation


Bundle 11.2.0.4 – Patch 20132517

  • Patch 19854503 – Database Security Patch Update 11.2.0.4.0 (CPUJAN2015) –> RAC-Rolling Installable
  • Patch 19877440 – Oracle JavaVM Component 11.2.0.4.2 Database PSU (JAN2015) –> Non RAC-Rolling Installable
export PATCH_LOC="/tmp"
cd ${PATCH_LOC}
unzip p20132517_112040_Linux-x86-64.zip
cd 2*

1. Shutdown databases and services
2. Apply DB PSU (19854503) but do NOT run DB PSU post install steps

cd 19854503
$ORACLE_HOME/OPatch/opatch napply -skip_subset -skip_duplicate

3. Apply OJVM PSU patch

cd ../19877440/
$ORACLE_HOME/OPatch/opatch apply

4. For 11.2.0.3 and 11.2.0.4 run the OJVM PSU post install steps followed by the DB PSU (or equivalent) post install steps.

cd $ORACLE_HOME/sqlpatch/19877440
sqlplus / as sysdba
SQL> startup upgrade
SQL> @postinstall.sql
SQL> shutdown immediate
SQL> exit;
cd $ORACLE_HOME/rdbms/admin
$ sqlplus / as sysdba
SQL> startup
SQL> @catbundle.sql cpu apply
SQL> @utlrp.sql
SQL> exit;


Who does MobaXterm?

Since few years that intermittently I use MobaXterm for accessing remote servers. It is very well done and great replacement for Putty, with tabbed ssh interface, integrated X11 and sftp solution.

But the main reason why I don’t fully use it is because I don’t know who develops it. The website of MobaXterm just has a contact form, no address, no name.

By doing some research one can find that Mobatek is a company based in a village East of Toulouse, France. The address can be seen here and the picture of the place can be seen on google maps. It is a very simple house, not a headquarters of a company as I would expect. Searching some more we end up at this engineer, which seems to be project manager at Thales Alenia Space.

The question remains: just a hobby? a secondary employment?

When seeing a software so well made one would expect to be part of some bigger company, at least with bigger apparence.

The only thing that conforts me is that the source code of MobaXterm is available here. But someone has checked it?


Maximize wifi speed at home – get the 300Mbps (or more)!

Finally I got 300Mbps Wifi speed at home between my laptop and the router. This means a theoretical 30MB/s for file transfer with other computer or with the NAS. In reality I get 16MB/s instead of the 5 or 6MB/s I was getting before. It was not easy to understand all the components that made so difficult to get it working. Here are my collection of tips for configuring the router:

1. Use WPA2-AES encryption

This type of encryption seems to be needed to have speeds above 54Mbps. But I could not find information if you can also get higher speeds by removing any encryption. In some forums say the 802.11n specification obliges the use of WPA2-AES encryption, but here it seems to say that you can get a 5 to 10% gain by removing encryption.

2. Use 40MHz bandwidth

It means it bonds two channels of the spectrum to transmit data. I did not knew about this until I saw the option recently on the router of my new internet provider.

3. Set the router to use a channel with free adjacent channel

This was the most difficult to find out about and the reason why I was on 144Mbps for long time. As I live in city center there are more than 10 networks on the range. Also I had always read that it is good idea to choose either channel 1, 6 or 11, not to have overriding channels. It comes out that every network in range uses one of those three channels. When I moved my network from using channel 11 to use now channel 8 (plus channel 7 or 9 as adjacent channel, the configuration does not allow to choose), my connection changed from 144Mbps to 300Mbps!